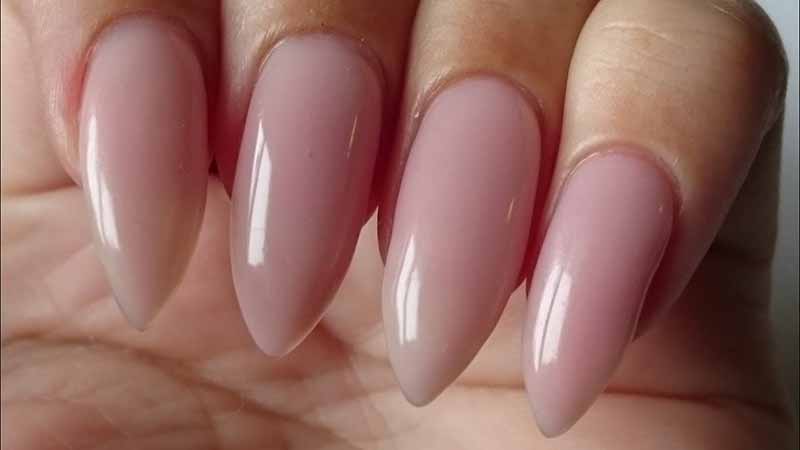
If you‘ve scrolled through social media recently, you’ve probably noticed a shift in nail aesthetics. Bold, intricate nail art is taking a backseat to something far more subtle: healthy-looking, naturally pink nails. This trend—often called the “clean girl nails” or “your nails but better” aesthetic—has taken the beauty world by storm. As nail artist Julia Diogo explains, it‘s the nail equivalent of a “no-makeup, makeup” look, perfect for those who love that effortless style and high-shine finish.
What makes this trend so universally appealing is its low-maintenance nature. Unlike acrylics or elaborate gel extensions, natural nails require significantly less upkeep, making them perfect for today’s busy lifestyles. Additionally, there’s a growing movement toward sustainability and clean beauty, with people opting for nail products free from harsh chemicals while still achieving a polished, put-together look. High-profile celebrities like Meghan Markle, who famously wore a soft pink manicure on her wedding day, and Jennifer Lopez have also embraced this understated elegance, propelling the trend into the mainstream.
The Real Benefits of Naturally Pink Nails
Beyond aesthetics, there are genuine health benefits associated with having natural pink nails. Healthy nails typically have a pale pink or mauve color, which is a direct indicator of good blood circulation beneath the nail plate. When your nails are this color naturally, it suggests that your nail beds are well-nourished, hydrated, and free from damage.

Embracing this natural look encourages better nail care habits overall. Rather than constantly painting and removing layers of polish, you focus on moisturizing, gentle grooming, and protecting your nails from damage. The result is stronger, smoother, and more resilient nails that require less maintenance in the long run. This approach shifts the focus from hiding imperfections to genuinely enhancing the health of your fingertips.
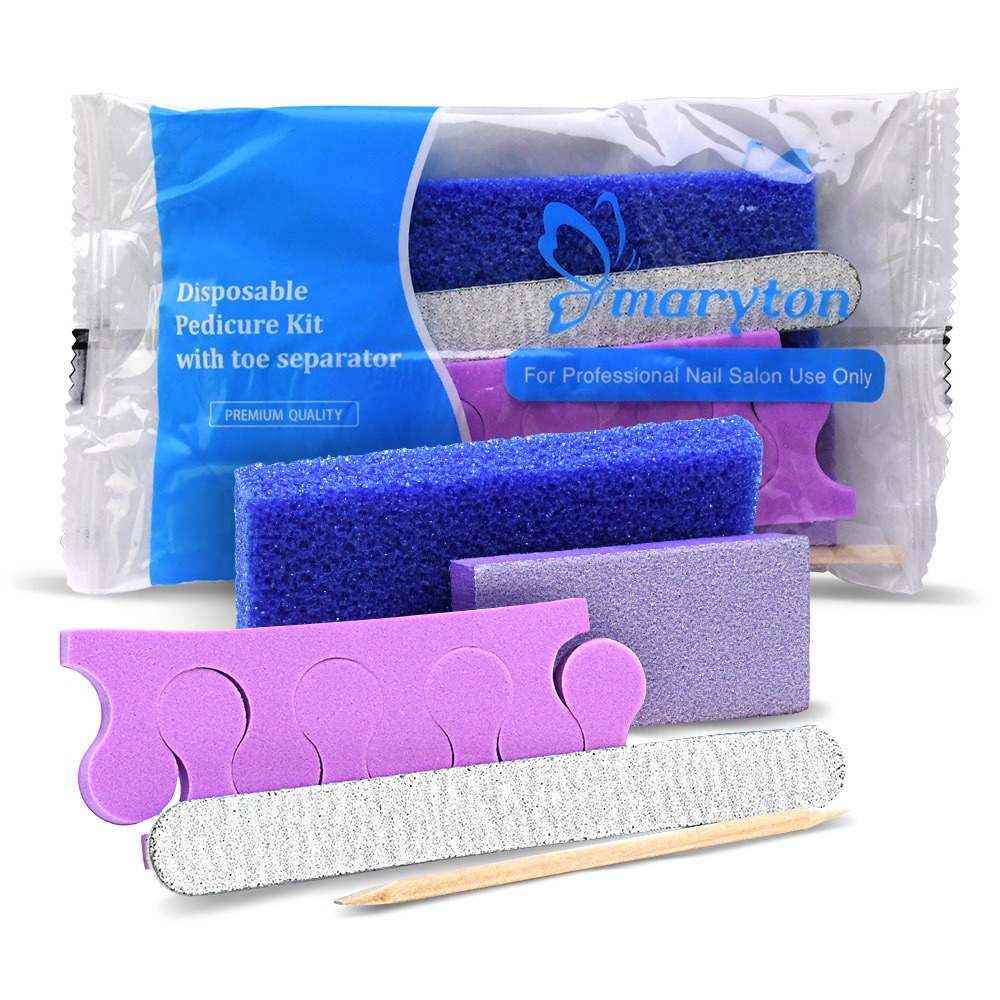
Essential Products for a Natural Pink Manicure
To achieve that perfect soft pink finish, you need the right products. Here is what should be in your kit:
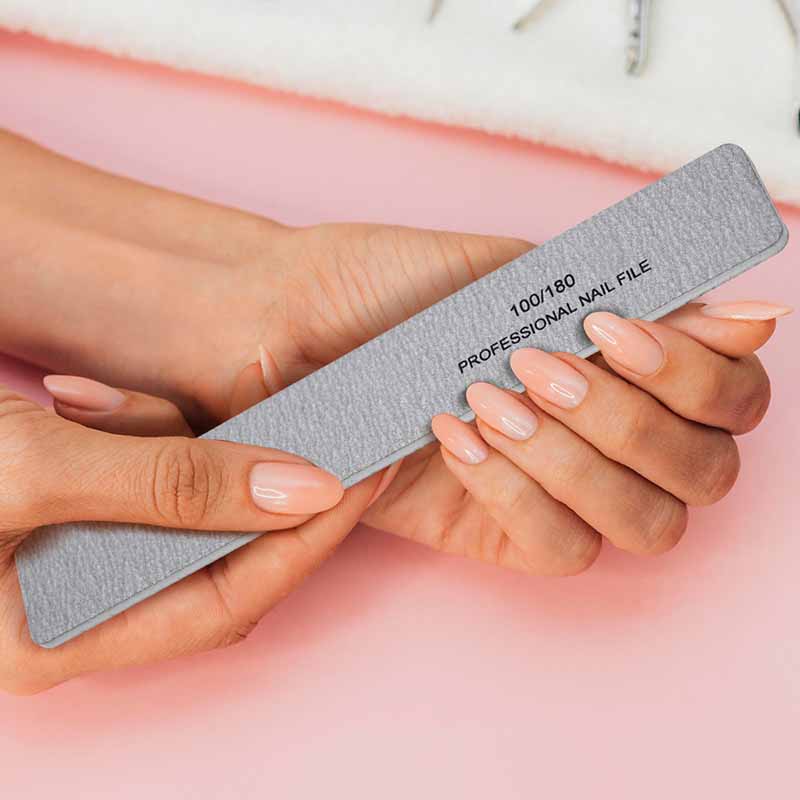
- Nail Prep Tools: Nail files and buffers, cuticle pusher, and a lint-free wipe.
- Base Coat: This protects your nails from staining and ensures the polish adheres evenly.
- Sheer Pink or Milky Nude Polish: Look for translucent “jelly” shades or milky pinks.
- High-Gloss Top Coat: This seals the color and provides that signature glass-like shine.
- Cuticle Oil: Essential for hydration and maintaining healthy nail beds.
Step-by-Step Guide to the Perfect Natural Pink Manicure
Follow these steps to achieve a flawless, professional look at home.
Step 1: Preparation. Start with clean, dry nails. Gently push back your cuticles and lightly buff the surface of the nail plate to remove natural shine. This creates a slightly porous surface for the polish to grip, preventing premature chipping. Wipe away all dust and oil with a lint-free wipe and nail cleanser.
Step 2: Apply a Base Coat. Apply a thin, even layer of base coat, ensuring you “cap the free edge” (run the brush along the tip of the nail) to seal it. Let this layer dry completely.
Step 3: Apply the Sheer Pink Polish. Instead of painting a single thick layer, apply two very thin coats of your sheer pink or milky nude polish. Thin layers are crucial—they dry faster, level out more evenly, and prevent unsightly bubbling. If you are using a gel formula, cure for 30-60 seconds under an LED lamp between each coat.
Step 4: Seal with a Top Coat. Finish with a high-gloss top coat. This step locks in the color, adds incredible shine, and significantly extends the life of your manicure. Remember to cap the free edge again.
Step 5: Hydrate. Once your polish is completely dry, massage cuticle oil generously into your nails and surrounding skin. This keeps the entire area hydrated, flexible, and looking healthy.
Common Mistakes to Avoid
Even with good intentions, you can sabotage your natural manicure. Avoid these pitfalls:
- Skipping Nail Prep: Failing to buff and clean the nail surface is a major cause of chipping and lifting.
- Applying Thick Coats: This leads to uneven drying, bubbles, and a bulky appearance.
- Shaking the Polish Bottle: This creates air bubbles in the formula. Always roll the bottle gently between your palms to mix.
- Forgetting the Base Coat: Skipping this step can cause your nails to stain and the polish to chip prematurely.
- Over-filing: Aggressively filing the nail plate makes them weak and prone to splitting.
The Bottom Line
Natural pink nails represent a beautiful shift in beauty priorities: valuing the health and longevity of your nails over flashy, complicated designs. By focusing on proper preparation, using high-quality sheer polishes, and practicing gentle aftercare, you can achieve a stunning, effortless look that truly lets your natural beauty shine.
Read also: The Complete Guide to Self-Adhesive False Nails: Press-Ons Made Perfect