
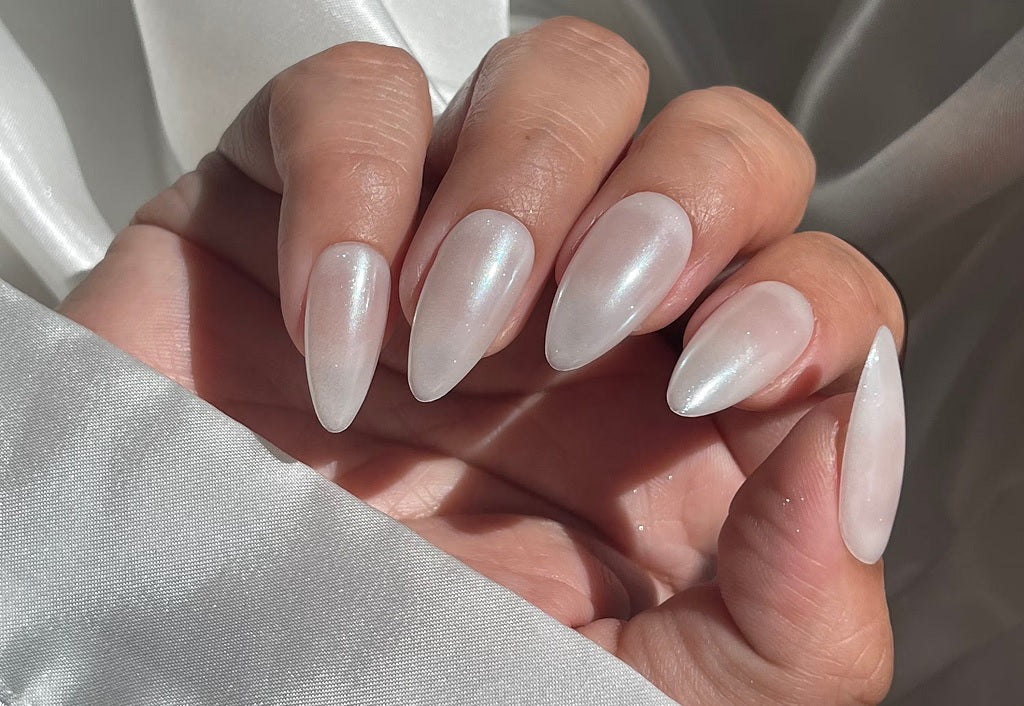
If you love elegant, natural manicures with a touch of shine, the Glazed Donut Nails trend is for you! Its subtle and sophisticated look makes it an ideal option for those who want a minimalist yet ultra-chic look.
What characterizes Glazed Donut Nails:
- A nude, white, or milky base for a soft and refined effect.
- A subtle pearlescent finish that subtly captures the light.
- An intense shine for a flawless glazed effect.
- A natural and elegant look, perfect in any setting.
Why we love this trend?
- A luminous and natural effect
Unlike bright colors or heavy nail art, Glazed Donut Nails remain understated and sophisticated.
- A manicure that lasts and blends well with new growth
Thanks to neutral shades and a glossy finish, this manicure stays flawless for longer.
- A versatile style
Perfect for any occasion: wedding, business appointment, or simply for a polished everyday look.
- A look that highlights healthy nails
With its glossy finish and nude effect, this manicure gives the illusion of naturally strong and well-groomed nails.
How to create Glazed Donut Nails?
Replicating this trend is easier than it seems. Here are the steps and essential nail supplies to achieve a perfect effect.
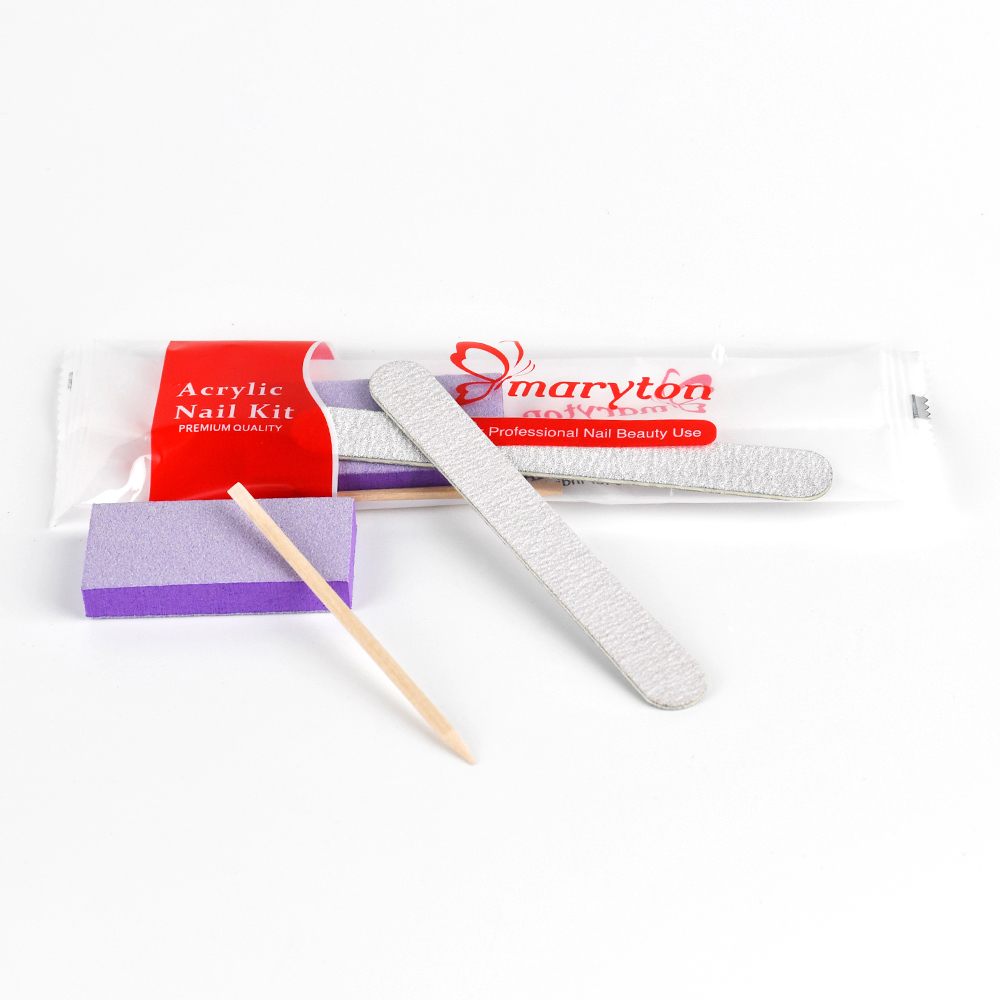
Step 1: Nail Prep
- Gently push back your cuticles with a cuticle pusher for a clean and neat outline.
- File your nails with the 80/100 grit wooden nail file to give them a natural and harmonious shape.
- Use a 100/180 buffer (found in manicure kits) lightly buff the surface to eliminate irregularities and allow the polish to better adhere.
- Apply a protective base coat, such as our soak-off base coat, to optimize color retention.
Step 2: Apply the base color
The key to Glazed Donut Nails is a nude or milky base for a soft and natural effect.
Step 3: Add the pearlescent effect
- Apply a residue-free topcoat and cure for a maximum of 40 seconds.
- Using a Baby Sponge or a silicone-tipped brush, generously rub the pigment over the entire surface until it no longer resists rubbing.
- File the edges of the free edge to remove the pigment at the tips.
Step 4: Seal and Shine
- Apply your choice of top coat for lasting shine and a flawless, smooth effect.
- Cure one last time under a UV/LED lamp to ensure long-lasting hold.
Variations and inspiration to personalize your Glazed Donut Nails
Love the effect but want to add a personal touch? Here are some ideas to vary your manicure while maintaining this luminous vibe:
- Pink Glazed Donut: Opt for a pale pink base for a softer, more feminine effect.
- Gold Glazed Donut: Replace the white pearl pigment with a gold pigment for a warmer look.
- Glazed Donut + French Manicure: Pair this pearly finish with a subtle French manicure for an even more sophisticated look.
- Holographic Glazed Donut: Add a pigment with multicolored shimmer for a more intense and modern effect.
Glazed Donut Nails are the perfect combination of natural, elegant, and modern. Easy to create, ultra-trendy, and suitable for all occasions, they’re the ideal solution for those who want a flawless manicure with ease.
Good https://shorturl.at/2breu
Awesome https://is.gd/N1ikS2
Very good https://is.gd/N1ikS2